REST Connector Configuration
On the Data Connections screen in MAPS Config, select Add Connection. Choose REST Connector from the list of data connection types.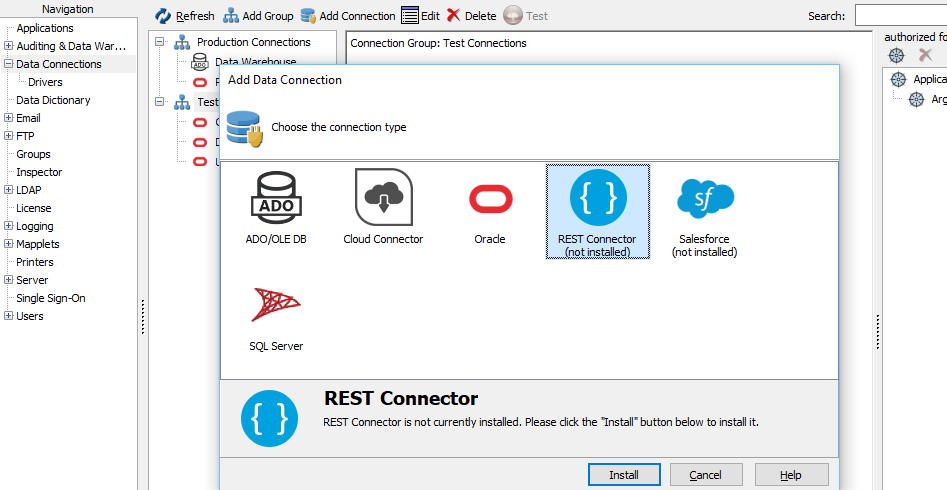
Select the Install button to download and install the driver.
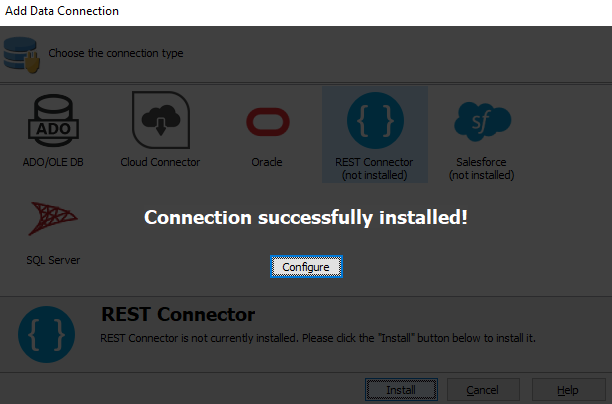
When installation is complete, select Configure to configure the data connection properties.
On the General screen, enter a descriptive name for the data connection, and any desired notes.

Driver Properties
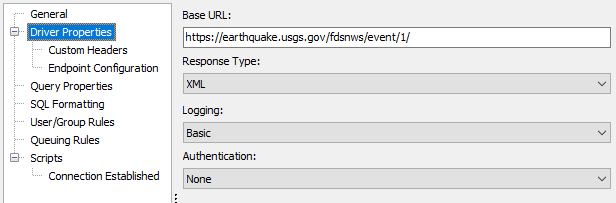
On the Driver Properties screen, enter the following parameters:
- Base URL - The base URL for the API to which you are trying to connect. A base URL does not typically return data itself, but is the root path of all endpoints provided by the API. Do not include endpoint names in the base URL-- these will be configured in the next step.
- Response Type - The format of the data returned by the API. Choose from JSON or XML. Note: if the API requires you to specify the desired format as a parameter, you will also need to include this parameter when configuring the endpoint(s) in the next step.
- Logging - The level of logging for this connection. Choose from Off (no logging), Basic (queries, numbers of rows returned, start/end time, and errors), or Full (adds cache queries, HTTP headers, request/response bodies, SSL negotiation, and additional details that may be helpful in troubleshooting). Logs are saved in the
C:\Program Files\Evisions\MAPS\Service\Logsdirectory on the MAPS server, and can be viewed on the Logging > Logs screen in MAPS Config. - Authentication - Choose from None, HTTP Basic, OAuth2, or Bearer Token.
- None - No authentication required, or authentication is being handled via a custom header in the HTTP request.
- Bearer Token - Authenticate using Bearer Tokens (also known as access Tokens). See Bearer Token Configuration for a REST Connector for details.
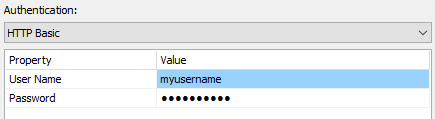
- HTTP Basic - Specify a username and password.
- OAuth2 - Authenticate using OAuth2. Requires registering MAPS with the application that is using OAuth2. Users will be able to select between the default authorization_code, or theclient_credentials option depending on what is specified in the REST API documentation. You will be prompted to log in to the application the first time the connector runs, in order to obtain an access token.
- When using the authorization_code Grant Type you will be prompted to log in to the application the first time the connector runs, in order to obtain an access token.
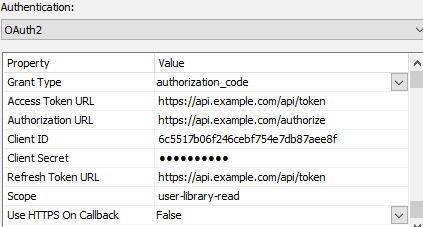
- Grant Type - A parameter for retrieving an access token.
- Client ID - A unique identifier that is generated during the registration process.
- Client Secret - A password-like value specific to MAPS that is generated during the registration process. This value needs to remain secure.
- Authorization URL - The URL used to authenticate MAPS to the application that is using OAuth. This URL should be provided in the API documentation for the application (look for a "for developers" section).
- Access Token URL - The URL used to generate an access token after the user is authenticated. Access tokens usually only last for a brief time if not used in conjunction with a refresh token.
- Refresh Token URL - The URL used to receive a refresh token to extend authentication. Refresh tokens may be good for up to 30 days, depending on the API. This means that the user will not need to authenticate or receive a new access token for 30 days once a valid refresh token is received. Note: depending on the API, the refresh token URL may be the same as the access token URL.
- Scope - A list of the resources (permissions) that need to be included in the access token in order to use an endpoint, if required. Refer to your API documentation to determine whether a scope is required.
- Use HTTPS On Callback - Specifies whether HTTP or HTTPS should be used for the callback URL. True (HTTPS) or False (HTTP). A self-signed certificate will be automatically generated when using HTTPS.
If you are configuring MAPS as the client in your OAuth application (the typical setup), you will need to specify http://localhost:3333 or https://localhost:3333 (depending on the Use HTTPS On Callback setting) as the callback URL in the OAuth application. This is the port MAPS uses for the HTTP listener that waits for the response from the OAuth application.
- When using the client_credentials Grant Type you will not be required to log in as a user, and instead will gain access through Client ID and Client Secret.
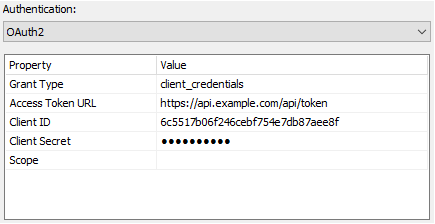
- Grant Type - A parameter for retrieving an access token.
- Access Token URL - The URL used to generate an access token.
- Client ID - A unique identifier that is generated during the registration process.
- Client Secret - A password-like value specific to MAPS that is generated during the registration process. This value needs to remain secure.
- Scope - A list of the resources (permissions) that need to be included in the access token in order to use an endpoint, if required. Refer to your API documentation to determine whether a scope is required.
Custom Headers
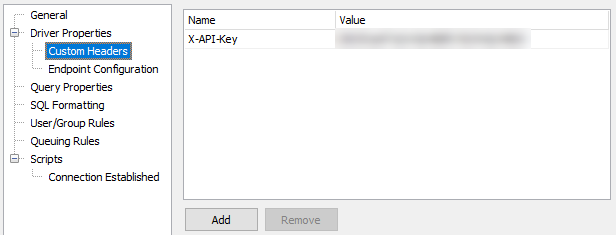
The Custom Headers screen allows you to include optional custom headers in the HTTP request, if the API supports or requires it. Custom headers may be used for authentication or to specify an environment (such as a sandbox account) of the REST source. Type in the name of the header field, followed by its value. Use the Add and Remove buttons underneath the list of custom headers to add or remove additional custom headers as needed.
Endpoint Configuration
Next, select Endpoint Configuration under the Driver Properties tab.
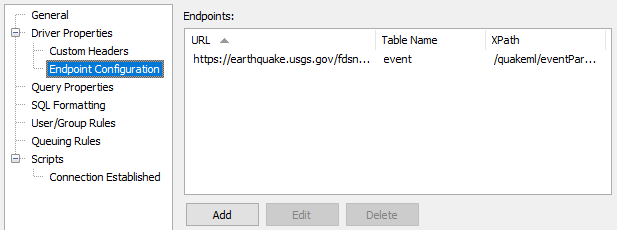
Select Add at the bottom of the dialog to add an endpoint.
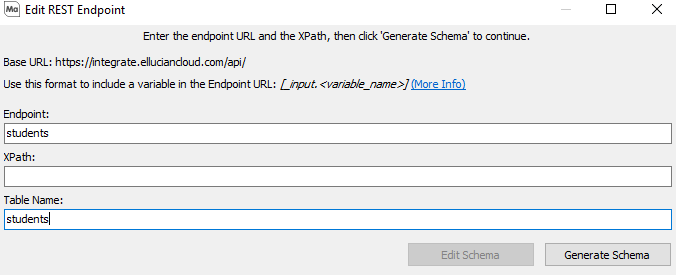
The Edit REST Endpoint dialog has three fields:
- Endpoint - The path to the endpoint. The path will be appended to the Base URL from the Driver Properties screen (shown above the field) to form the complete URL to the endpoint.
- XPath - An optional path to a repeating element within the XML or JSON response. This can be used to split the response into multiple rows. The XPath format differs depending on whether the response is XML or JSON. MAPS will attempt to detect the XPath for you when you generate the schema, but it may need to be modified to meet your needs.
- Table Name - The name for the table for this endpoint as it will appear in Argos. The table name is derived from the schema name, and is similar to a table name in a relational database. For example, if you set the table name to "earthquake", you could query it as select * from earthquake. If you leave the table name blank, MAPS will attempt to populate it from the data when generating the schema. You can then modify the name as desired.
Your Endpoints may require a variable value to be placed in the URL path. To use a variable in the Endpoint URL, use the format [_input.<variable_name>]. For Example, if searching for students by ID, at the Endpoint: students/{id}, you would type: student/[_input.id] in the Endpoint field. Whatever field is used for [_input.<variable_name>] must be in the schema.
Note: This format will only work when the WHERE clause contains "=" for the variable. In addition, only a single value can be assigned to the variable.

Generate Schema
Select the Generate Schema button to generate the schema file by calling the API using the parameters and paths specified. You will be prompted to (temporarily) edit the constructed URL to include query parameters that limit the data. This will allow the API call to complete faster so that you can quickly retrieve a list of fields without downloading a lot of data.
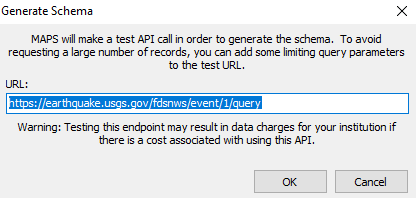
As an example, for the earthquake API above we might add a start and end time to the query to limit it to a few results:
https://earthquake.usgs.gov/fdsnws/event/1/query?format=xml&starttime=2014-01-01&endtime=2014-01-02
Select OK to proceed. Depending on the amount of data being returned, it may take a moment to complete the request. If the request was successful, you should see an updated XPath, the schema name, and a list of fields in the Fields table below.
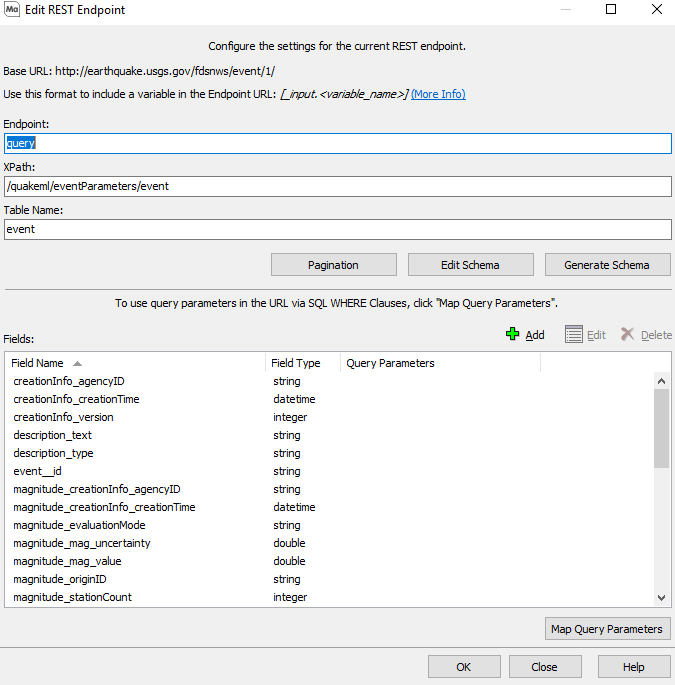
- Add - This will allow you to add fields to the schema that were not detected by the REST Connector.
- Edit - This will allow you to change properties of fields in the schema.
- Delete - This will allow you to remove fields from the schema file.
The Edit Schema button opens the definition file for the schema. You may need to modify this file if a field is not detected as the correct data type. Otherwise, you should not need to make changes to the schema definition.
Pagination
The REST Connector supports customization of four different pagination styles, each of which allows all available sets of data to be returned. Once configured, the REST connection endpoint will automatically page the results when a query is executed and the full result will be returned.
Selecting the Pagination button will open the Pagination Options window.
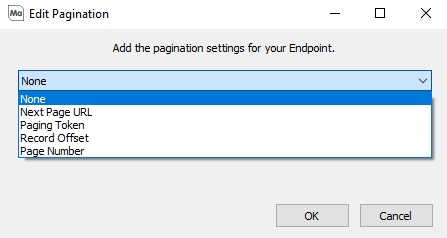
The default option will be set to None, which means that the API will not page through the data. Open the drop-down list to select one of the four types of pagination supported by the REST Connector.
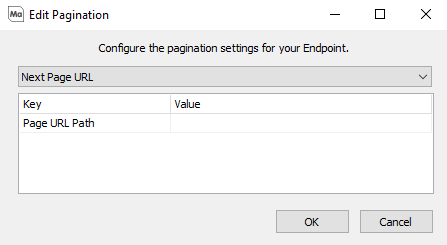
- Next Page URL
- Page URL Path - If the URL is passed in the response body, you must input the XPath to the element with the URL. A common configuration is to have the URL in the response header with a "Link" header. If this is the case, you will specify "header:Link" for this value.
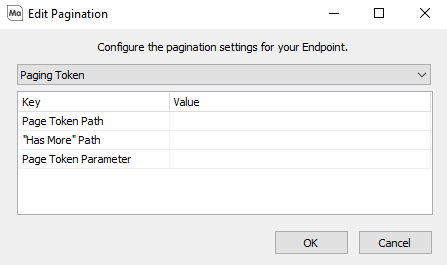
- Paging Token
- Page Token Path - The path to the token that is passed from the API. It should be set to the XPath of the element.
- "Has More Path" - If a source includes this option, you will need to put the XPath to this variable in the response body.
- Page Token Parameter - The name of the parameter that is used to pass the token to the API. If the paging token is passed to the API via a query parameter, set this to the name of the parameter. If the paging token is passed to the API via the request body, set this to its XPath.
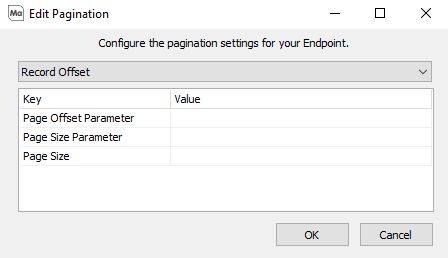
- Record Offset
- Page Offset Parameter - The name of the query parameter that does the offsetting. A common name APIs use for this parameter is "offset".
- Page Size Parameter - This should be left blank when working with Record Offset pagination.
- Page Size - The Page Size should be set to the default size as listed on the API documentation for the endpoint that's being configured.
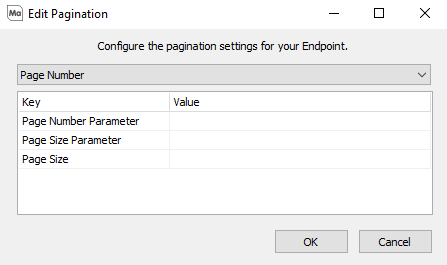
- Page Number
- Page Number Parameter - The name of the query parameter that specifies the page number. A common name APIs use for this parameter is "page".
- Page Size Parameter - The name of the query parameter that specifies the size of the page. A common name APIs use for this parameter is "pagesize". This parameter is not included in all sources that use this pagination style. Sources that do not include this parameter do not allow you to control the number of records on each page. For this case, the Page Size should be set to this fixed number. When a source does include this parameter, the Page Size can be set to any number within the acceptable range for this parameter.
- Page Size - The number of records to be returned on each page.
Map Query Parameters
The next step is to map query parameters available in the API to the different comparison operators for each field that DataBlock Designers may want to use in their queries. This allows MAPS to intelligently convert (or 'map') the query written by the user into an API call that makes use of the available URL parameters provided by the API. Without this, the API call will request all records, and then MAPS will filter the results after they come back.
Select a field that relates to a parameter available in the API, then click the Map Query Parameters button.
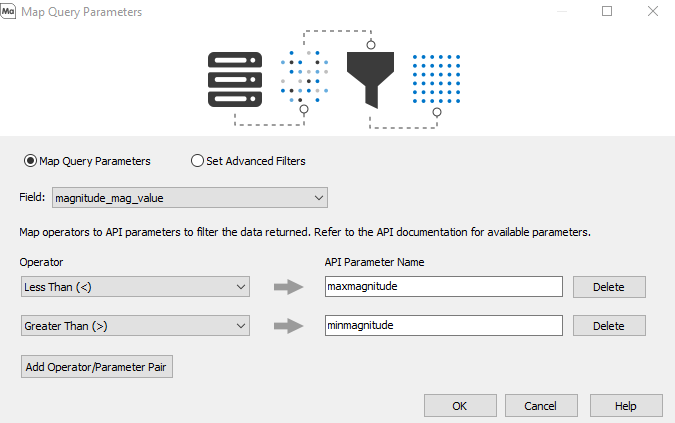
You will default to the Map Query Parameters page, however you will also have the option to navigate to the Set Advanced Filters using the radio buttons near the top.
Use the Add Operator/Parameter Pair button to add the operator(s) you want to configure, then enter the parameters that should be associated with those operators.
In the example above, we are specifying the parameters that will be used if a query uses the less than or greater than comparison operators against the magnitude_mag_value field in its WHERE clause. If the query contains WHERE magnitude_mag_value > 5 (i.e., limiting results to earthquakes with magnitudes greater than 5), the API call will now contain &minmagnitude=5 in the parameter list.
Queries must be kept relatively simple in order to take advantage of any query parameter mappings you have configured. See the Query Construction section at the end of the Using the REST Connector in Argos page for examples of supported SQL.
Set Advanced API Filters
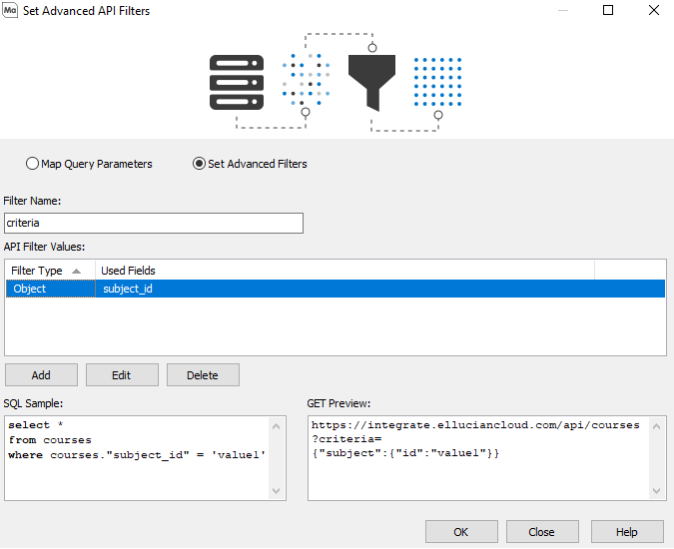
Selecting the Set Advanced Filters radio button will allow you to configure JSON objects/arrays that will be used in the URL of an endpoint.
- Filter Name - The specified parameter name of the filter you are adding.
- API Filter Values - The list of filters already configured.
- Add, Edit and Delete - Allows you to add, edit, or delete an API filter.
- SQL Sample - This displays an example of the simplest SQL statement required to trigger the JSON Object Filter.
- GET Preview - This displays an example of a GET request being sent, including the JSON query parameters.
Selecting Add, Edit, or Delete will open the Edit Advanced API Filter screen.
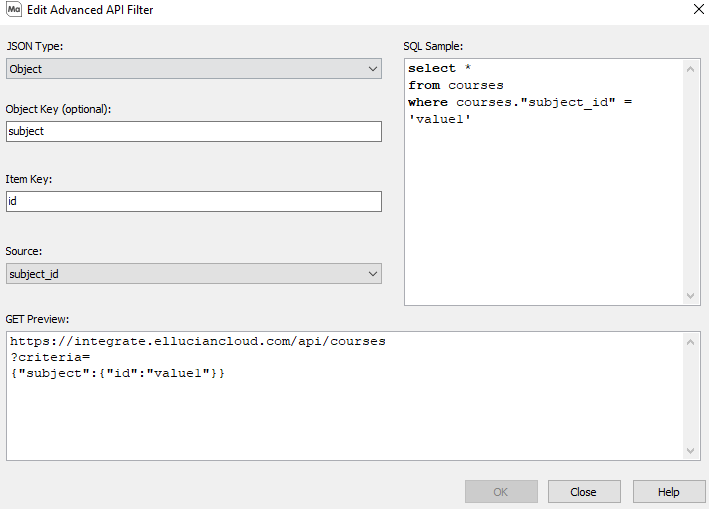
- JSON Type - A drop-down with the option of selecting Object or Array.
When Object is selected as the JSON type:
- Object Key - The input to specify the object key.
- Item Key - The input to specify the item key.
- Source - A drop-down used to select the schema field that will trigger the filter.
When Array is selected as the JSON type:
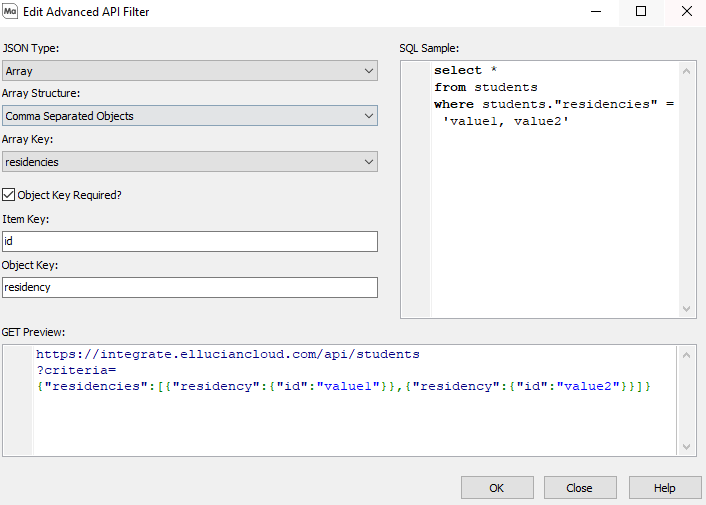
- Array Structure - A drop-down with the option of selecting Comma Separated Objects or Single Objects.
- Array Key - The name of the Array.
When Comma Separated Objects is selected as your Array Structure, you will see the following options:
- Object Key Required - If checked, you will be presented with an Object Key input.
- Item Key - The item identifier.
- Object Key - The object identifier.
When Single Object is selected as the Array Structure, you will see the following options:

- Key/Item Source Multicolumn - The Key/Item Source pairs within the JSON object. The Key represents the identifier for each item within the object. The Item Source is the field from the schema that triggers the inclusion of the value in the object when used in a SQL statement.
- Add and Delete - These buttons allow you to create new Key/Item Source pairs, or remove the selected Key/Item Source pairs.
The REST data connection configuration is now complete. You do not need to modify any values on the Query Properties or SQL Formatting screens. If you want to set up specific users or groups on the User/Group Rules screen, each group that you want to be able to use this connection should be set to the default of "Use connection user name and password".
Lastly, authorize the connection for use with the desired application(s).